Integrations
Jira Cloud Integration
Jira Cloud Integration let you send incoming feedback to Jira directly or selectively.
Jira Cloud integration allows you to automatically create Jira issues from the feedback you receive, allowing your team to manage and track them in Jira. Additionally, you can synchronize comments and status changes between Userowl and Jira.
-
Navigate to Integrations: In your Userowl project settings, click on the "Integrations" tab in the left-hand navigation menu. Locate the Jira Cloud card and click Activate.

-
Click Activate: A popup will appear, click Continue to be redirected to Atlassian. If your organization don't have any active Jira Cloud connections press Continue. To reuse an existing connection go to .....

Reusing existing Jira Cloud connection
If your organization already has an active connection for your Jira Cloud account, these will be listed in this popup. Go to Reusing Existing Jira Cloud Connection for details.
-
Log In to your Atlassian Account: You may be prompted to log in to your Atlassian account. (If you are already signed in, go to the next-step).

-
Authorize Userowl: You'll be prompted to grant Userowl access to certain actions on Atlassian account. Select the appropriate site from the dropdown. Review the requested permissions and click Accept. You will be redirected back to Userowl.

Logging in to your Atlassian Account
You may be prompted to log in to your Atlassian account. Please log in with an administrator account and continue with authorizing step.
-
Configure Integration Settings: After successful authorization, you'll be redirected back to Userowl to configure the integration settings. Select the Jira project you want to integrate along with mapping and syncing settings. When you're done, click Activate to finish setting up your integration..

-
Integration Activated: Your Jira Cloud integration is now active. You can now start sending feedback to Jira.

You can configure the following settings for your Jira Cloud integration:
- Site: Select the Jira site you wish to integrate with.
- Project: Choose the specific Jira project where issues will be created.
- Issue Type Mapping: Select how Userowl feedback types should map to Jira issue types.
-
Automatic: Userowl will automatically map feedback types to the available Jira issue types. If your project uses custom Jira issue types, consider using the other mapping options.
-
Single Issue Type: Choose a single Jira issue type for all feedback types.

-
Map Each Feedback Type: Manually map each Userowl feedback type to a corresponding Jira issue type.

-
-
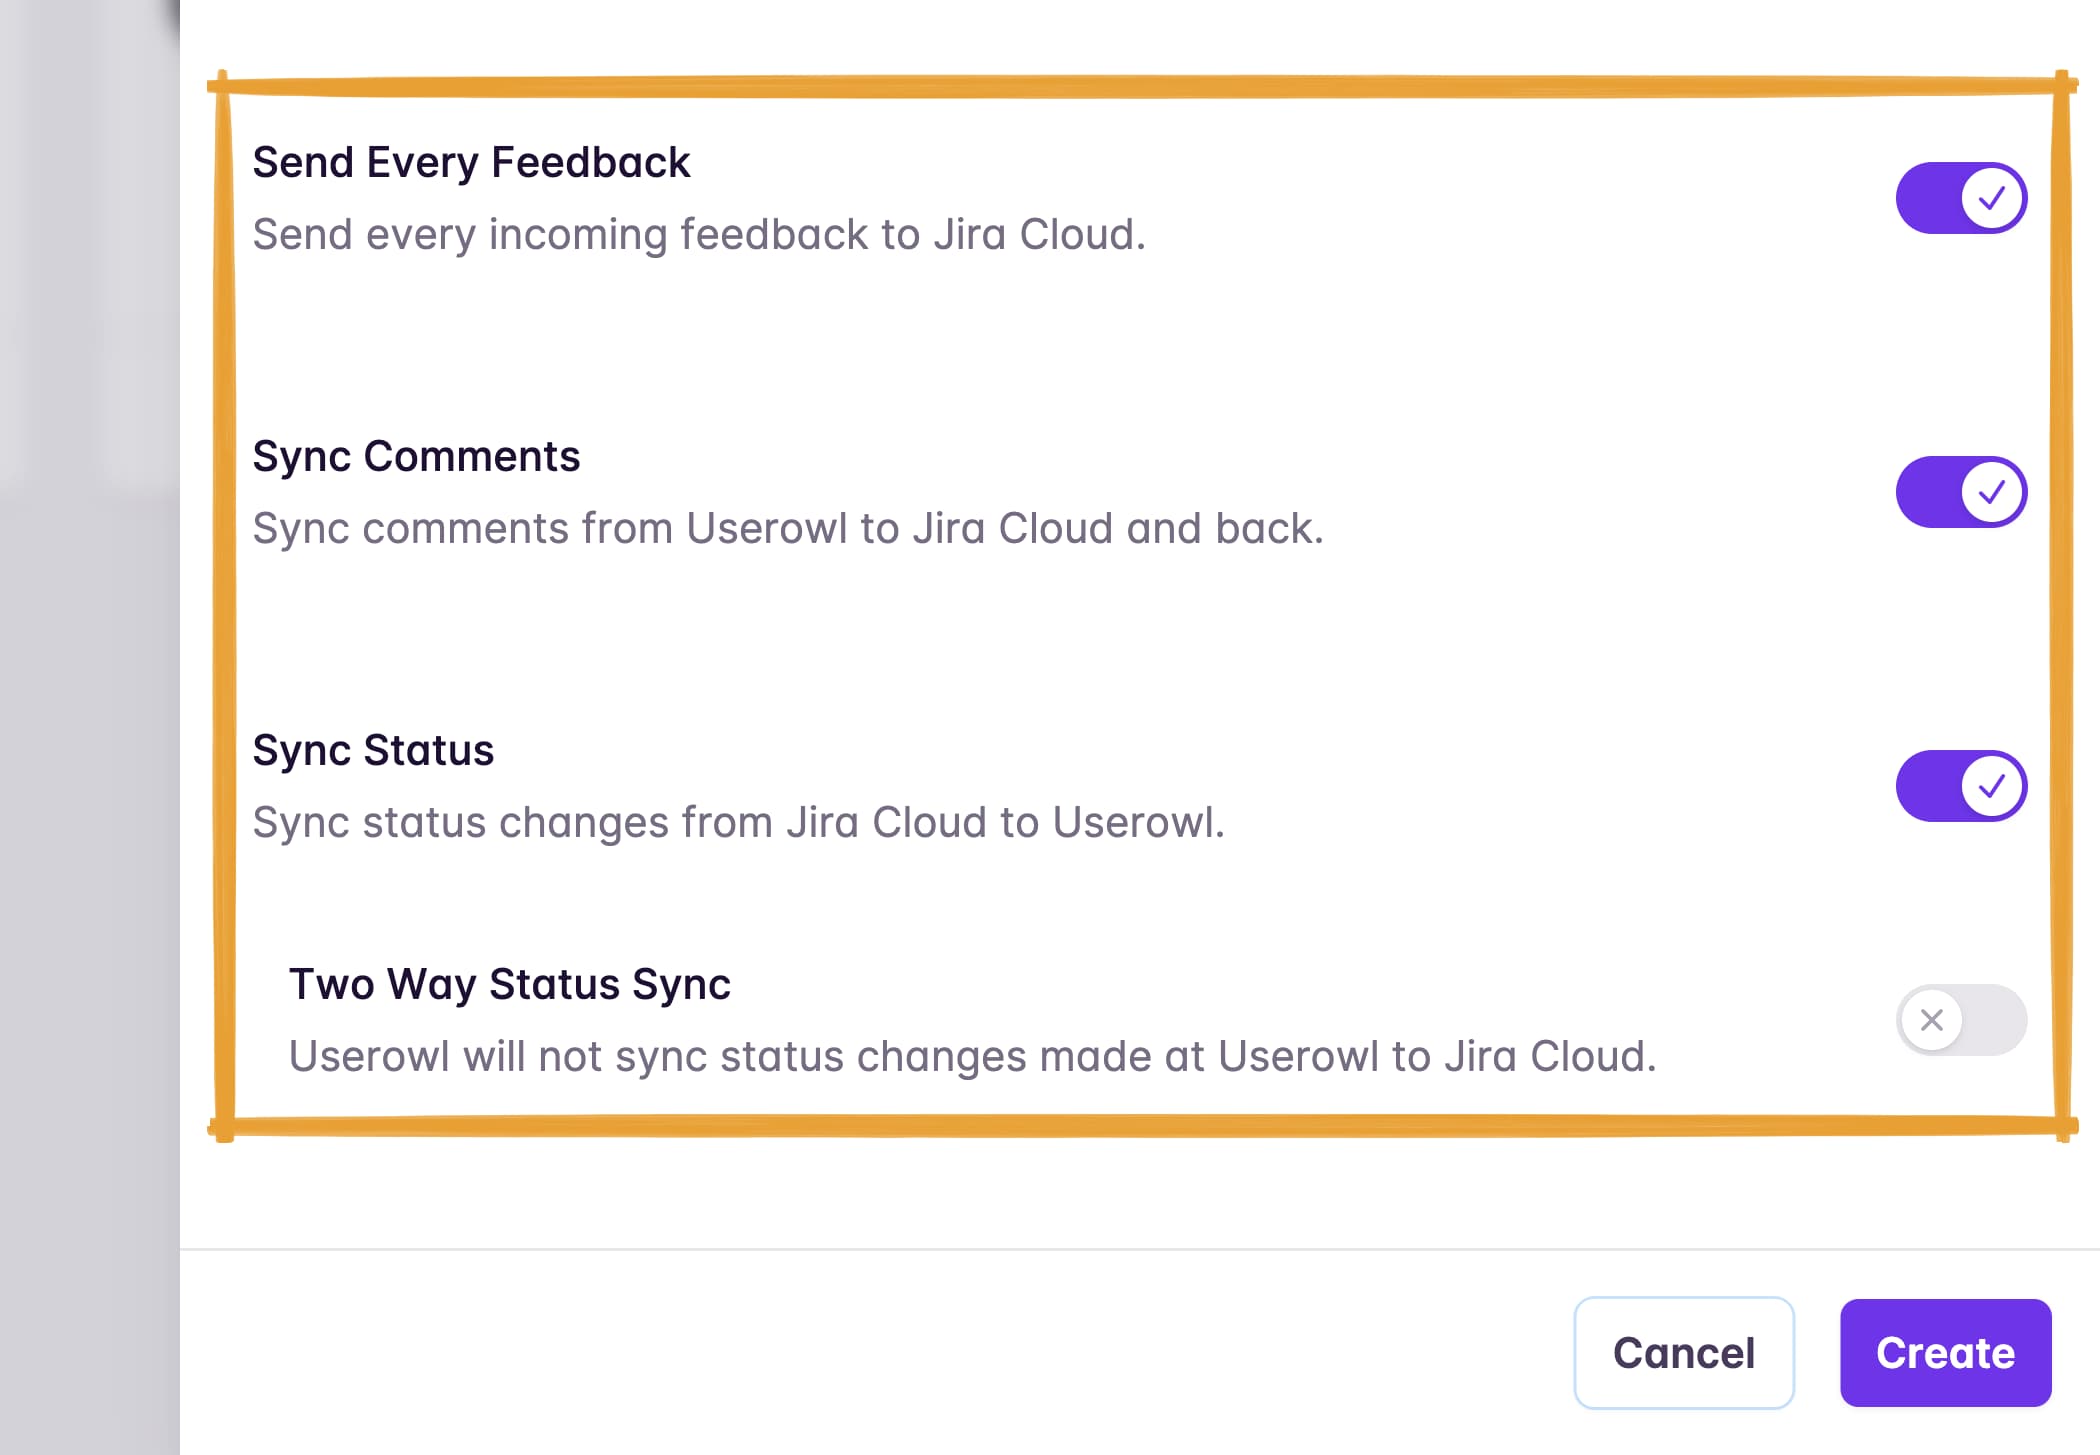
Send Every Feedback: Enable this option to automatically create a Jira issue for every feedback received in Userowl for this project. If disabled, you can manually send feedback to Jira from the feedback detail page.
-
Sync Comments: Enable this to synchronize comments between Userowl and Jira. Comments made in Jira will be synced to the corresponding feedback in Userowl, and comments made in Userowl will be synced to the corresponding Jira issue.
-
Sync Status: Enable this to synchronize status changes between Jira and Userowl. Userowl will try to keep the status of the feedback in sync with the status of the corresponding Jira issue. This option requires you to have a similar workflow in Userowl and Jira. If the corresponding Jira issue moves to a status that doesn't exist in Userowl, the status will not be updated in Userowl.
- Two-Way Status Sync: Enable this to synchronize status changes made in Userowl back to Jira. This ensures that any status changes made in Userowl are reflected in Jira. If disabled, Userowl will only receive status updates from Jira.
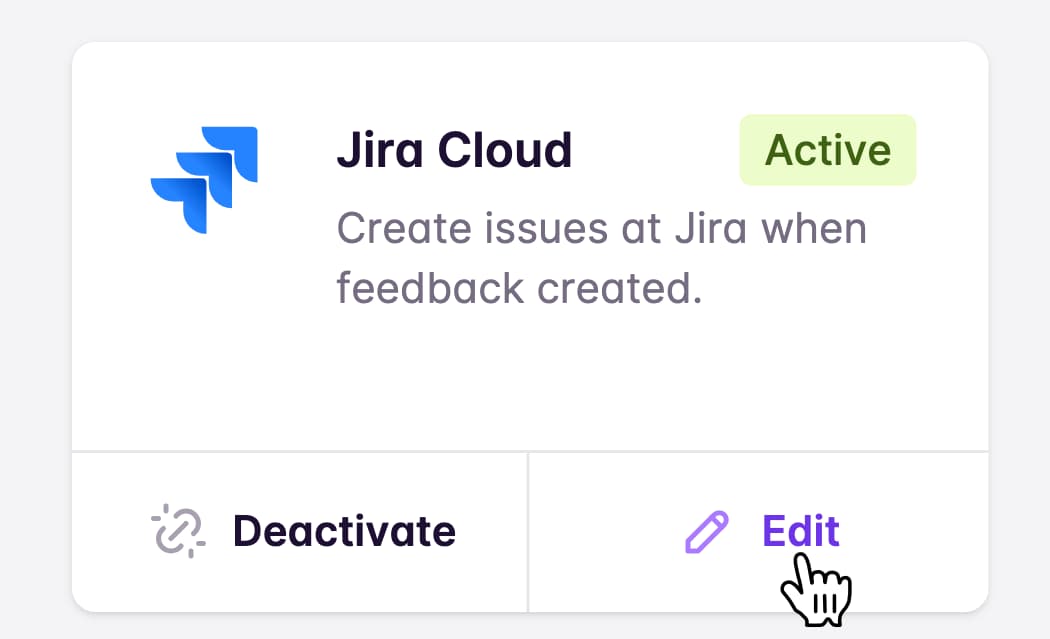
Once active, you can edit your integration settings by clicking the Edit button on the Jira Cloud integration card at any time.
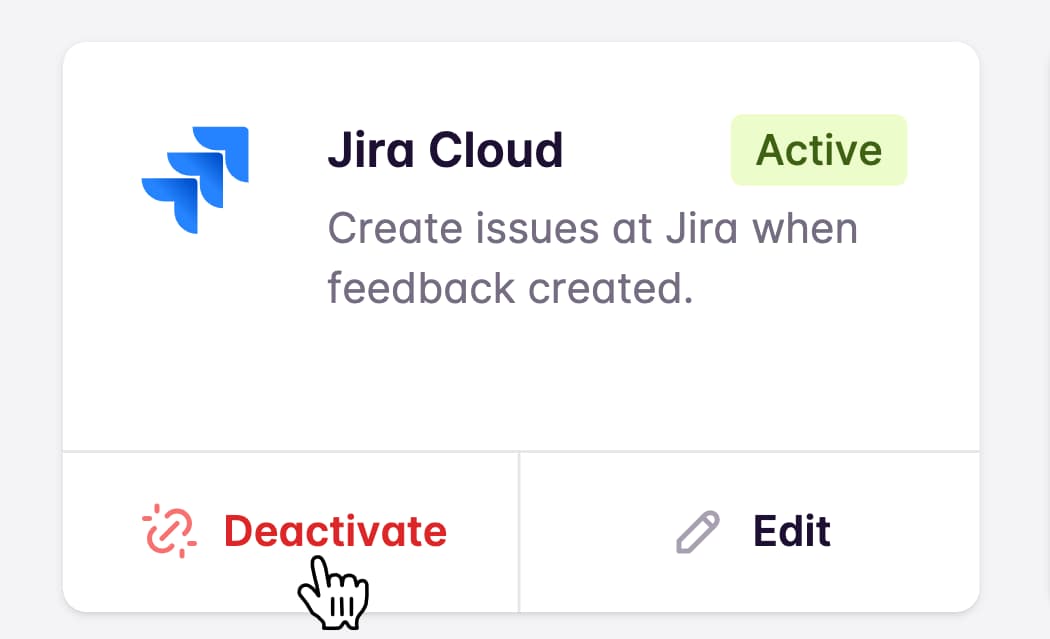
You can deactivate a integration for your project by clicking the Deactivate button on the Jira Cloud integration card. This will stop sending feedback to Jira and disable the integration. Existing links on feedback will remain but synchronization of active feedback will not continue. This will not affect the other projects that are using the same integration.